Part 2 because there is an image limit in the blogs.
Now, we can move onto the last section of this tutorial, is modifiers. (I really want to go into shading, but that is its own beast. I do recommend playing around with the shader editor an looking into other people’s tutorials about it. It is crazy powerful.)
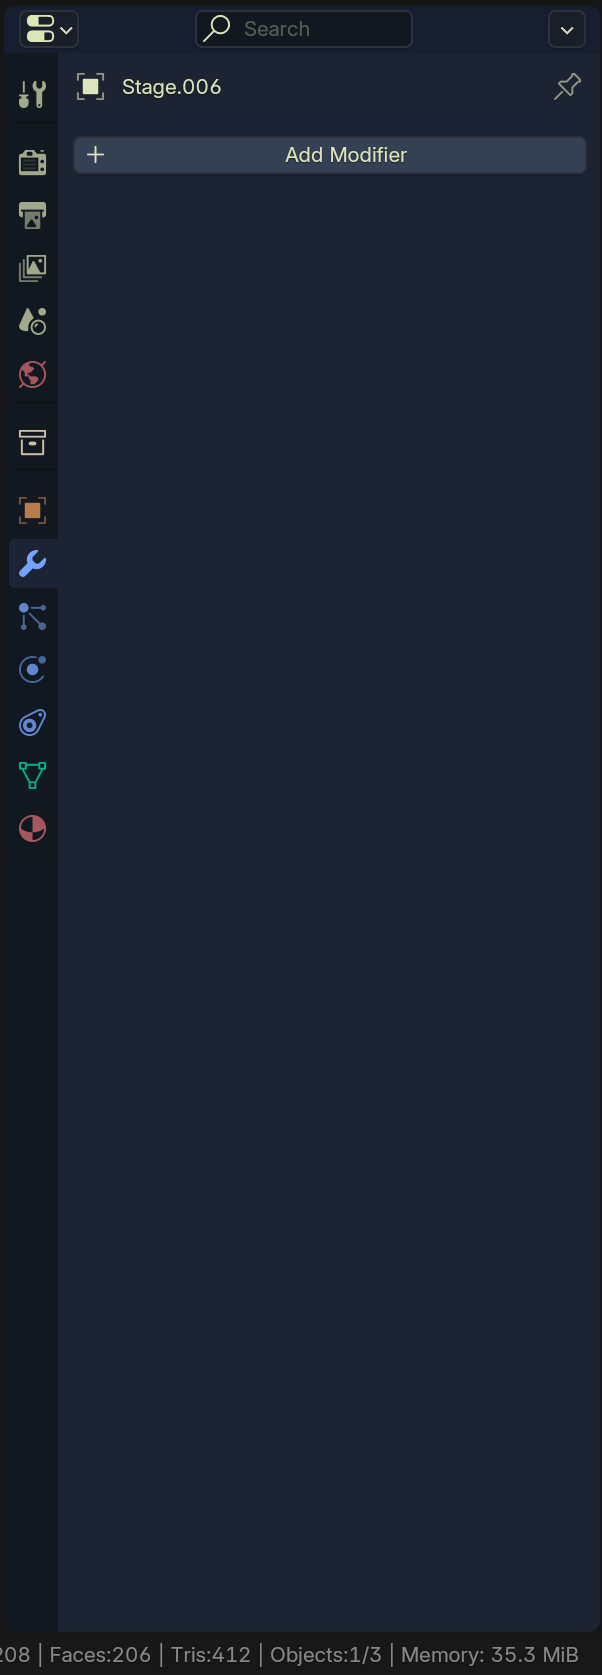
This window on the right that has been sitting idle, is the properties window. Anything that you would want to change about the scene, or object is made here.

From the top on the left hand side of the window we have:
1st Tool Settings, is you currently selected tool’s options. Useful for drawing + sculpt modes
2nd Render settings, skipping this for now, there is so much to go over at a later date. Lets you fine tune you renders from how many ray-casts to applying outlines to your models.
3rd Output, basically all the settings for file types, are your rendering an image or video, audio codecs, bit rates, color depth, compression, etc.
4th View layer, very advanced settings useful for splitting output for editing in video software or layering multiple scenes (Operating the background lighting and character lighting) Also lets you render specific passes of your lights.
5th Scene Settings, where you can tweak and edit the ‘world’ your objects are in. Changing the unit scale, gravity, Rigid Body settings, etc.
6th World Settings, allows you to control the background in render mode. In EEVEE the world’s background color applies indirect lighting to the whole scene. (Sadly today we will not be messing with it.)
7th Collection Settings, I don’t ever touch this
8th Object Settings, these settings are determined by object. This panel lets you change anything about the object from position, rotation, scale, all in one place. It also allows you to edit parenting relationships, how it looks in the view port and a whole lot of other crazy things.
9th Modifiers, where this tutorial is going to end :< This is where you apply all Non-Destructive modifiers.
10th Particle Systems, I don’t think I really need to explain it much here, particles + hair stuff.
11th Physics, physics sims and basic collision systems. ***Physics in Blender are HEAVY ON COMPUTATION. PHYSICS ARE CPU BOUND IN BLENDER, there are other physics engines that can run in Blender, but those cost $$$. If you plan to do a lot of physics based stuff like I tend to do, you want some horses behind your CPU.
12th Constraints, as far as I’m aware, its not like CAD constraints. Its basically modifiers that you can apply to have an object face a point or other object, stretch to stuff, the whole 9 yards. Animatable and fully controllable.
13th Object Data, I have never used this either.
14th Material Settings, this is how you make things look nice in the render mode. I’d recommend using the shader editor workspace instead of trying to use this window.
What I want you todo, if you were poking around in the other tabs is enter the Modifiers tab (The blue wrench.) You should now see the name of you object and a button reading [Add Modifier] we are going to go over each section of modifier, but only going to use 1.
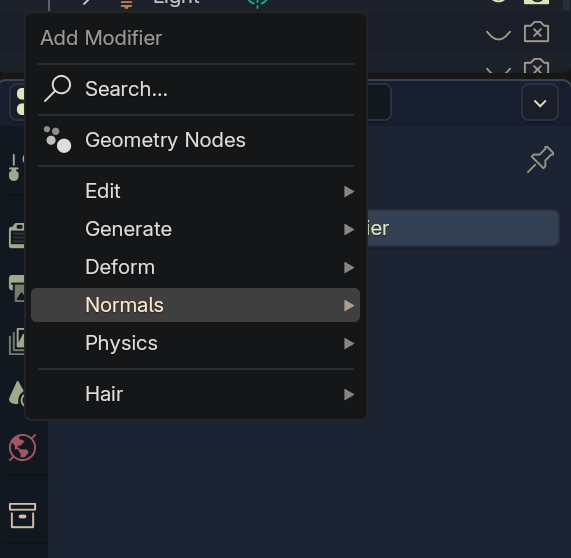
Clicking on the add Modifier button will bring up a new drop-down.

Search, Look for a modifier by name
Geometry Nodes, basically create your own modifier with a node based system, similar to the shader editor.
Generate, modifiers that will create new geometry
Deform, modifiers that do not create new geometry but instead, change its structure or appearance.
Normals, this is a new tab to me, might be new to blender 4.4?
Physics, add quick physics settings. Its still best to do it from the physics menu that was listed from above.
Hair, this hair modifier is the newer hair system implemented recently when blender introduced Geometry Nodes. This is way more performance friendly than the particle system, and have a lot more control over the hair’s shape and messiness, but are not able to be animated or respond to physics YET. Blender 4.5 I think was going to address this but I have not been able to get 4.5 stable on Ubuntu because of the Vulkan and Opengl issues.
Hovering over one of the options will reveal the modifiers in each category. For today we will be using the Generate category.
I do want to go over every single one at some point, but that will easily push this into more blog posts sooooooooooooo, the one we will be going over is Subdivision Surface.
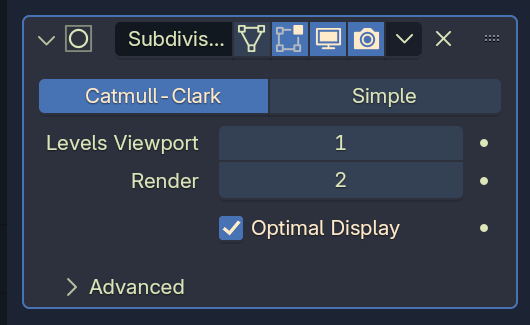
Subdivision Surface takes quads and divides them by 4. For lack of a better explanation, basically take a square and cut it into 4 equal smaller squares. It does this for each face on the object, hence the need to use Tris and Quads.

Depending on your hardware, Subdivision Surface can get really performance hungry, there are options to enable GPU subdivision in Preferences >> Viewport >> Subdivision >> GPU Subdivision, if you have a beefy GPU or weak CPU.
The subdivision modifier is pretty straight forward. It has 2 modes, Catmull-Clark, and Simple. I’m sure there is an explanation to the name, but I don’t know it at this time.
Catmull-Clark: Smooths edges during subdivision
Simple: Maintains the shape during subdivision
Both of these modes have their purposes, but for the sake of brevity, go with Catmull-Clark.
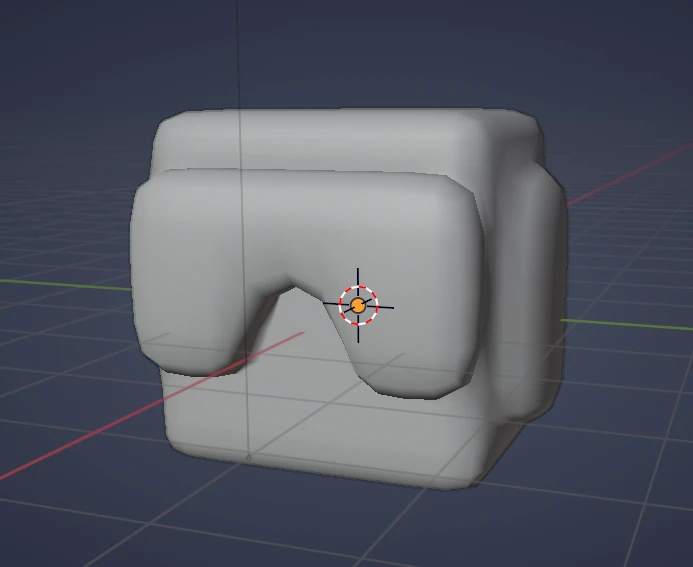
Now while you are still in Object Mode, right click on the head and select Set Shade Smooth You should be looking at a rather rounded head.

If you have something like this, a ‘smoothed’ tank man, congrats, you’ve made it. You can call this the end if you want, or you can keep playing with Blender. I do hope you were able to follow along with a very minimal amount of problems.
I know text isn’t the best way to convey information when it comes to 3D but there is a huge lack of it anywhere for people who can’t stand crappy tutorials and having to sit through almost 30 minutes to find out the questions you’ve come to find answers for, never being answered. At least with a text tutorial I can read faster than the video plays. I do hope that you had some fun with this little deep dive into 3D modeling, and that you were able to gleam something from it.